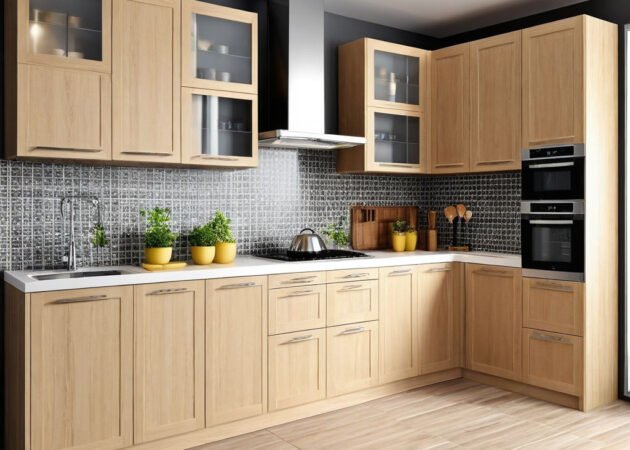
Vinyl plank flooring has become one of the most popular choices for homeowners seeking a stylish, durable, and affordable flooring solution. Whether you’re looking for an elegant wood-like appearance or an easy-to-maintain surface, vinyl plank flooring delivers on all fronts. But how do you install it, and what are the costs involved?
In this step-by-step guide, we’ll cover everything you need to know about vinyl plank flooring installation and the cost, helping you make an informed decision.
Step 1: Understanding Vinyl Plank Flooring
Before diving into installation, it’s important to understand what vinyl plank flooring is. Vinyl planks are made from synthetic materials, designed to replicate the look of plank wood flooring but with more durability and water resistance. It’s available in a wide range of styles, including options that mimic wood plank flooring, stone, and tile.
Vinyl plank flooring offers several advantages:
- Water-resistant: Great for kitchens, bathrooms, and basements.
- Easy to clean: Simple maintenance with just sweeping and mopping.
- Durable: Resistant to scratches and dents, perfect for high-traffic areas.
- Cost-effective: Lower cost compared to hardwood or tile.
For further insights, check out our Affordable Countertops section to complement your flooring choices.
Step 2: Preparing for Installation
Proper preparation is key to a successful vinyl plank flooring installation. Here’s what you need to do:
- Measure Your Space: Accurately measure the area where you’ll be installing the vinyl plank flooring. Be sure to account for any closets or alcoves to ensure you have enough material.
- Choose Your Style: Vinyl plank flooring comes in a variety of styles. Whether you prefer plank wood or a more modern look, choose a design that fits your space and decor.
- Acclimate the Planks: Let your vinyl planks sit in the room where they’ll be installed for 48 hours before installation. This allows the material to adjust to the room’s temperature and humidity, preventing warping or expansion.
- Prepare the Subfloor: Your subfloor should be clean, dry, and level before you begin. If you’re installing over concrete or tile, make sure there are no major cracks or irregularities.
For more flooring options, visit our Hardwood Flooring section.
Step 3: Installing Vinyl Plank Flooring
Now that your space is prepped, let’s move on to the vinyl plank flooring installation process.
- Gather Your Tools:
- Utility knife
- Spacers
- Measuring tape
- Rubber mallet
- Tapping block
- Level
- Lay the First Row: Begin by placing spacers along the walls to allow for expansion. Start at one corner of the room and lay the first row of vinyl planks with the tongue side facing the wall. Use the spacers to maintain a 1/4-inch gap between the planks and the wall.
- Click or Glue the Planks Together: Depending on the type of vinyl plank flooring you’ve selected, you’ll either use a click-and-lock system or adhesive. For click-and-lock, simply align the plank and click it into place. For adhesive planks, apply the glue according to the manufacturer’s instructions.
- Stagger the Seams: Ensure the seams of the planks are staggered by at least 6 inches to create a more natural look, similar to real wood planks.
- Trim the Final Planks: When you reach the opposite wall, you may need to trim the final row of planks to fit. Use a utility knife to score and snap the plank to the right size.
- Install Baseboards: Once the flooring is complete, remove the spacers and install your baseboards. This will cover the expansion gap and give the room a polished finish.
Step 4: Vinyl Plank Flooring Cost
One of the most appealing aspects of vinyl plank flooring is its affordability. However, the cost of vinyl plank flooring can vary based on the style, brand, and installation method. Here’s a breakdown of what to expect:
- Material Costs:
- Basic vinyl plank flooring typically costs between $2 to $4 per square foot.
- Higher-end options, such as wood plank-look vinyl, may cost $5 to $7 per square foot.
- Installation Costs:
- For professional installation, expect to pay an additional $1.50 to $5 per square foot.
- DIY installation can save you money, but it requires time and tools.
- Additional Costs:
- If you need to level your subfloor or remove old flooring, this could add $1 to $3 per square foot to the overall cost.
- Total Cost:
- For an average 200-square-foot room, expect to pay $400 to $1,400 for materials and $300 to $1,000 for installation, depending on the type of vinyl and whether you hire a professional or do it yourself.
For more cost-effective home improvement ideas, check out our Inexpensive Kitchen Remodel section.
Check Our Recent Projects
Step 5: Maintenance Tips for Vinyl Plank Flooring
Once your vinyl plank flooring is installed, keeping it looking new is easy:
- Sweep regularly to remove dust and debris.
- Mop with water and a mild cleaner to maintain the floor’s shine.
- Avoid abrasive cleaners, which can damage the surface.
- Use furniture pads to prevent scratches and dents from heavy furniture.
Vinyl plank flooring is durable and low-maintenance, making it a great option for busy households. You can find more tips on caring for your floors in our Laminate Flooring section.
Conclusion: Is Vinyl Plank Flooring Right for You?
Vinyl plank flooring offers a fantastic combination of style, durability, and affordability, making it an excellent choice for any room in your home. Whether you’re installing it yourself or hiring a professional, this flooring type provides a high-end look without breaking the bank. With proper care, your vinyl plank floors will last for years, providing both comfort and beauty.
At America’s Dream HomeWorks, we provide expert installation services to make your vinyl plank flooring project seamless. Whether you’re looking for a quick update or a full renovation, our team is ready to assist you.
If you’re ready to start your flooring project, visit our Vinyl Plank Flooring page for more options and expert advice, or contact us today!
